If you’re looking to deploy the latest version of Windows 10 1703 (better known as the Creators Update) as a fresh install, please check out this post. This post is designed to walk through installing and configuring Microsoft Deployment Toolkit and to create a Task Sequence to upgrade to Windows 10 1703 from a previous version of Windows. The Windows upgrade process has come along way in recent years, so in certain circumstances it may be worth while running an upgrade, rather than a wipe-and-load. Additionally with Windows 10’s frequent updates being the case now, rather than doing upgrades via WSUS which may not be preferable depending on your environment, it may be better to do upgrades in a more controlled way.
Installing & Configuring Microsoft Deployment Toolkit and Dependencies
We’ll be using Microsoft Deployment Toolkit (MDT) version 8443, which at the time of writing is the most recent release and fully supports Windows 10 1703. Here’s the links to download the software we’ll be installing:
- Windows 10 1703 Assessment and Deployment Kit (ADK)
- Microsoft Deployment Toolkit (8443)
- Windows 10 1703 x64 .iso (Volume Licensing Service Center
First, we’ll install the Windows 10 1703 ADK. The setup will need to download additional files so it may take some time depending on your internet connection.
IMPORTANT NOTE: If you have SecureBoot enabled, you’ll get a “Program Compatibility Assistant” dialog displayed and after installation, WIMs will fail to mount and unmount. This is a known issue and there is a workaround.
On the Select the features you want to install screen select:
- Deployment Tools
- Windows Preinstallation Environment (Windows PE)
- Imaging And Configuration Designer (ICD)
- Configuration Designer
- User State Migration Tool (USMT)
Now install MDT by running the setup file downloaded earlier, there is no specific configuration during the install wizard. After it’s installed we need to create the Deployment Share.
Create the Deployment Share
- Open the Deployment Workbench from the Start Menu.
- Right click on Deployment Shares.
- Select New Deployment Share.
- Enter the path for the Deployment Share:
E:\DeploymentShare - Enter the Share name:
DeploymentShare$ - Give the share a descriptive name.
- On the Options screen, accept the defaults as you can change them later.
- Complete the wizard to create the share.
We now need to add an Operating System to work with.
Add an Operating System
- Mount the Windows 10 1703 .iso in File Explorer.
- Go to Deployment Workbench > Operating Systems.
- Right click and select Import Operating System.
- In the wizard, select Full set of source files and then enter the root of the mounted .iso as the Source directory.
- For the destination directory name enter Windows 10 Enterprise 1703 x64 and complete the wizard.
- Go to the Operating Systems node again and rename the OS you just added to Windows 10 Enterprise 1703 x64.
Note: The upgrade process will not work with custom images, so you cannot build a reference image like in my previous post and use that to upgrade a computer to the latest version of Windows with all updates and applications. However, you can configure the MDT Task Sequence to install applications and run Windows Update.
Importing Applications (Optional)
You may want to add some applications to install, here I’ll cover how to add Microsoft Office. MDT recognises Microsoft Office and provides automated/silent install options.
- Go to Deployment Workbench > Deployment Share > Applications.
- Right click on Applications and select New Application.
- In the New Application Wizard, choose Application with source files.
- Give the application the name: Microsoft Office.
- Enter the Source directory of the installation files.
- Enter the Destination directory: Microsoft Office.
- For the Command line enter anything - we’ll revisit this soon.
- On the summary page, click Next and after the files are copied click Finish to complete the wizard.
Configure the Application - Microsoft Office
- Right click on Microsoft Office, go to the Office Products Tab.
- Choose the desired Office Product to Install from the drop down menu.
- Check the desired Office language.
- Enter a product key, unless you will be activating Office via KMS in which case leave the Product Key option unchecked.
- Check the Customer name option and enter the desired information.
- Check the Display level option and select None in the drop down menu.
- Check the Accept EULA option.
- Check the Always suppress reboot option.
- Click Apply.
- Go to the Details tab and the Quiet install command should now read:
|
|
Microsoft Office is now set up to be installed silently by a Task Sequence. Please note that this will install Microsoft Office along side any previous versions. If you wish to customise the installation to a greater degree and remove older versions, the Office Customization Tool can be launched from the Office Products tab. This process can also be done for Microsoft Visio and Project applications. We need to now create the Task Sequence that will upgrade the currently installed version of Windows to Windows 10 1703.
Create a Task Sequence
- In Deployment Workbench, go to Task Sequences.
- Right click and select New Task Sequence.
- For the ID enter: W10-1703-UP.
- Name it Upgrade Windows 10 1703.
- Select Standard Client Upgrade Task Sequence.
- Select the Operating System Windows 10 1703 x64.
- Do not specify a product key at this time.
- Enter an Organization name.
- Do not specify an Administrator password at this time.
- Complete the wizard.
Now we’ll configure the Task Sequence.
Configure the Task Sequence
- Right click on the Task Sequence just created and select Properties.
- Go to the Task Sequence tab on the Properties window of the Task Sequence.
- Go to the Post-Processing folder and select Windows Update (Pre-Application Installation).
- On the right side of the Properties window, go to the Options tab.
- Uncheck the Disable this step tick box and do the same with Windows Update (Post-Application Installation).
- Go to the Install Applications item.
- If you skipped the Importing Applications section, please disable the Install Applications item and go to step 10, if not please continue.
- In the right side of the Properties box, select the Install a single application option and click the Browse… button.
- Select Microsoft Office and change the name Install Applications to Microsoft Office.
- Click Apply and close the Task Sequence.
Next we’ll create a domain user account for MDT.
Create an Active Directory User for MDT
- Go to Active Directory Users and Computers.
- Create a user called
mdt_admin - On the server where the deployment share is hosted, give
mdt_adminFull Control share permissions and Full Control permissions to all the files and folders under the deployment share.
Now we’ll configure the Bootstrap.ini and the Rules.ini files to control certain aspect of the deployment environment. The settings below enable auto log in and skip the welcome screen, so these should only be used for lab/closed environments.
Configure Bootstrap.ini
- In Deployment Workbench, right click the Deployment Share and select Properties.
- Select the Rules tab and click the Edit Bootstrap.ini button.
- Add the settings below to the Bootstrap.ini.
- Close and Save the Bootstrap.ini
|
|
Configure Rules.ini
On the Rules tab of the Deployment Share properties window, add the settings below. A lot of the settings are specific to my lab environment such as my location in the world.
The [Virtual Machine] section near the top is one example of how to manage drivers and auto fill computer names.
|
|
Run the Upgrade Task Sequence
Now it’s time to run our Upgrade Task Sequence. For my demo here, I’ll be using a “lived-in” Hyper-V virtual machine running Windows 10 Professional 1511 x64 - OS Build 10586.164. It has Office 2016, Adobe Reader, Google Chrome, Adobe Flash, and Firefox installed, it’s connected to a domain and has local user profiles from domain users on it with customised settings and personal data. It’s also localised to the UK. The VM is configured as such:
- 2x vCPUs
- 4GB of RAM
- NIC with access the the local network and domain, MDT and WSUS server.
- Virtual Hard Drive of at least 80GB, on an SSD.
- With the VM running Windows normally, log in as a user with access to the MDT Deployment Share.
- Navigate to
\\SERVERNAME\DeploymentShare$\Scriptsand run the LiteTouch.vbs script. - After a short delay you will be presented with the Windows Deployment Wizard and a list with the Task Sequence you created earlier.
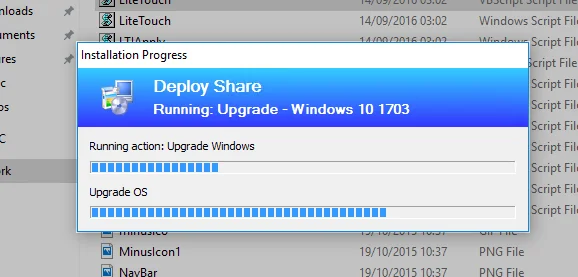
- Select Upgrade Windows 10 1703 and click Next.
The Task Sequence will now run, upgrade to Windows 10 1703 x64, update from the WSUS server, install Microsoft Office applications (if you added them), run Windows Update from the WSUS server once again, and then shutdown. When the device is logged into, all user data, settings and programs should be migrated and available as before. The full Windows version should be Windows 10 1703 x64 OS Build 15063.483 - the current version with all Windows Updates as of 27th July 2017. You may also want to add other application installs to your Task Sequence, such as these common applications, depending on your environment.
Google Chrome - Enterprise Installer
|
|
Adobe Reader - Enterprise Installer
|
|
You now have a functioning Microsoft Deployment Toolkit server, with a Deployment Share configured to upgrade to Windows 10 1703 x64.
If you have any questions or comments, please leave them below.
-Mike