UPDATE 2017-11-07
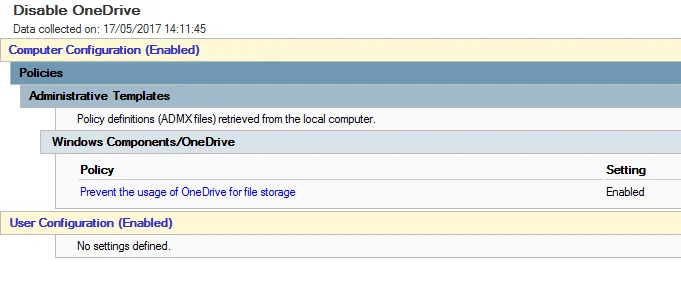
After testing the method below on Windows 10 1703, I found that it wasn’t working as it did with 1607. To disable One Drive and remove the One Drive folder from the Navigation Pane of Windows Explorer, enable the group policy item: Computer Configuration/Policies/Administrative Templates/Windows Components/OneDrive/Prevent Usage of OneDrive for file storage and also set the following registry key from 1 to 0:
|
|
Please note that the registry key must be set on a per user basis. You can set it via a log in script. For my environment, I customise the Default Profile, so I edit the registry in the Task Sequence which sets the option for all future profiles created after deployment.
Original post
Disabling OneDrive for Windows 10 (and previous versions for that matter) is a relatively easy task to accomplish, but if you’re doing some profile customisation and setting the “CopyProfile” option in the Unattend.xml then you’ll need to do some extra work to make sure that it’s disabled, and hidden as expected. The first thing to do is to set the Group Policy option to disable OneDrive. It’s a computer only option which you’ll find under Computer Configuration/Policies/Administrative Templates/Windows Components/OneDrive/Prevent Usage of OneDrive for file storage you’ll need to set the option to enabled.
If your Windows 10 user profiles are created from the standard default profile then OneDrive should be disabled. When you logon you may see the OneDrive entry in the Navigation pane of Windows Explorer for a short time, but it should disappear eventually. If you are employing a different method creating profiles, either from a custom default profile being created and then copied via the CopyProfile setting in the Unattend.xml or another way, then you will need to make sure that the OneDrive first run setup is being run on login as the Group Policy setting only takes effect properly (removing the OneDrive entry from the Navigation bar) when this is done. For my environment I chose to do this during the deploy Task Sequence in MDT, after the Application Installs. I added the lines below into a batch script which I use to do a few small final tasks.
|
|
The reason I’ve chosen to do this like is because during my build task sequence, options are set for the Administrator user, which when the image is captured and then deployed, the CopyProfile option copies the Administrator users profile and uses it for as the template for user profiles afterwards. The OneDrive setup first run doesn’t carry over because it’s already run as the Administrator, so you have to restore it. I attempted to just enter the reg key during the very end of the build Task Sequence but it didn’t work. Only after setting it as in the batch file above, during the final steps or the deploy sequence did it work as intended. This is an oddly specific problem that I faced, hopefully my sharing it will help others.
If you have any questions or comments, please leave them below.
-Mike