As Windows is now delivered ‘as-a-service’ with major updates being released biannually, you may want to push out these major updates using WSUS. In previous posts I’ve covered deploying Windows 10 1703 (Creators Update) as a clean install with Microsoft Deployment Toolkit and also how to perform an upgrade to Windows 10 1703 using MDT. In this post, I’ll walk through the process of pushing out the upgrade to Windows 10 1703 using WSUS. I’m going to assume that you already have Windows Server Update Services set up. If you don’t, don’t worry here’s a walkthrough I made previously.
Prerequisites
I have created a Computer Group in WSUS called Upgrades and assigned computers to it using Group Policy. The Windows Updates settings in Group Policy are set to automatically install any updates I approve in WSUS at a specific time, everyday. For this walkthrough I’ll be upgrading two Windows versions: a Windows 7 install and a Windows 10 1511 install, just to show the differences. Both installs are Hyper-V VM’s and are fully patched. The upgrade to Windows 10 1703 will be deployed from the WSUS server running on a fully patched Windows Server 2016 Hyper-V VM. Both the Windows 7 and Windows 10 1511 VMs have a local profile for a domain user account, with lots of data stored locally on the PC and several pieces of software installed such as Flash, Google Chrome, Office 2016, Adobe Reader and VLC.
Upgrading Windows 7 to Windows 10 1703 with WSUS
Let’s upgrade the Windows 7 install first. This update requires user interaction on the Windows 7 install, so I wouldn’t personally recommend this method to upgrade all of your old Windows 7 devices to Windows 10, but for devices that need to have software and data persevered it may be preferable to a clean install.
Finding and Approving the Update for Windows 7
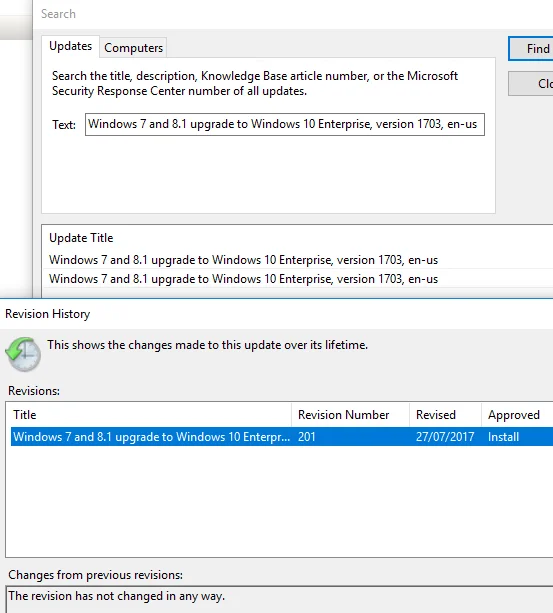
We need to find the relevant update in WSUS. For my Windows 7 VM, it is listed as Windows 7 and 8.1 upgrade to Windows 10 Enterprise, version 1703, en-us, your language and edition may vary though.
- Expand the server node in the WSUS console.
- Right-click on Updates, and select Search in the menu.
- In the Search box, under the Updates tab enter the name of the update that is appropriate for you. Please note the edition and language may be different from my example above.
- When the search completes, you should have a few results.
- Right-click on each of the updates and select Revision History.
- You’ll want the most recent Revision Number. For my example above, it’s 201.
- Right-click on the update you wish to approve, and select Approve.
- Choose the Computer Group you wish to Approve the update for and click OK. Please note: depending on your configuration this will download and push out the upgrade to Windows 10 on all devices in the group.
- Close the Search box, and WSUS should be downloading the update to Windows 10 1703. It is approximately 5GB in size.
Once the update has downloaded, it will be available to the devices it has been approved for.
Performing the Upgrade on Windows 7
On my Windows 7 VM, I logged in as my domain user and checked for updates. It moved to the Upgrades Computer Group I had created for it in WSUS, but the Windows 10 1703 update wasn’t downloading. In Windows Update it reported as failed with the error code: 0x80240020, and in WSUS the computer was reporting the update installation as failed with the same error code also. After waiting for 24 hours and trying a few tricks (like resetting Windows Update), I had to edit the registry to get the Update to work.
Go to the following registry key:
|
|
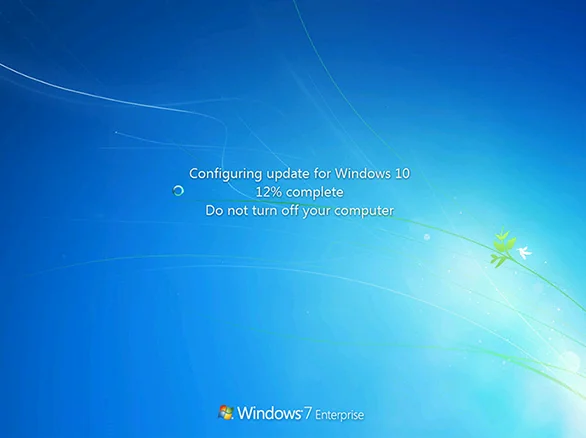
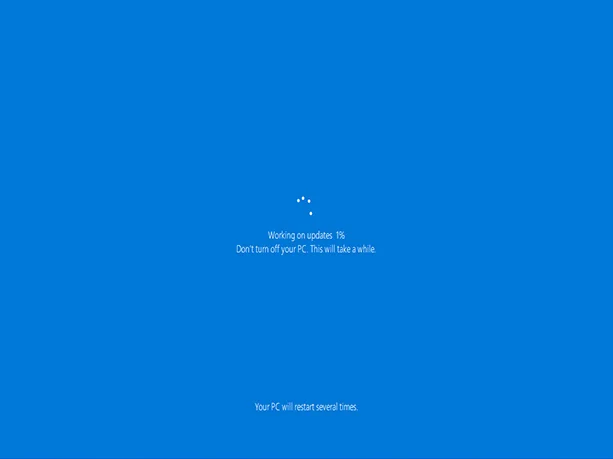
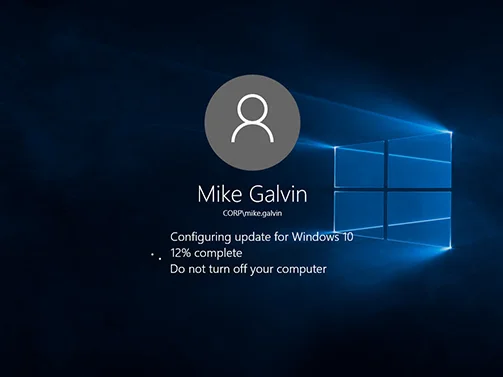
Create a new DWORD (32-bit) Value with Name: AllowOSUpgrade and set the Value: 0x00000001. After creating this registry key, I went to Windows Update and it reported that it was ready to install the upgrade to Windows 10. I selected to to perform the upgrade and after downloading I was presented with a few screens asking if I wanted to proceed with the upgrade. The familiar Windows Update install screen appeared on shutting down Windows 7 and upon reboot the now even more familiar Windows 10 update install screen was displayed.
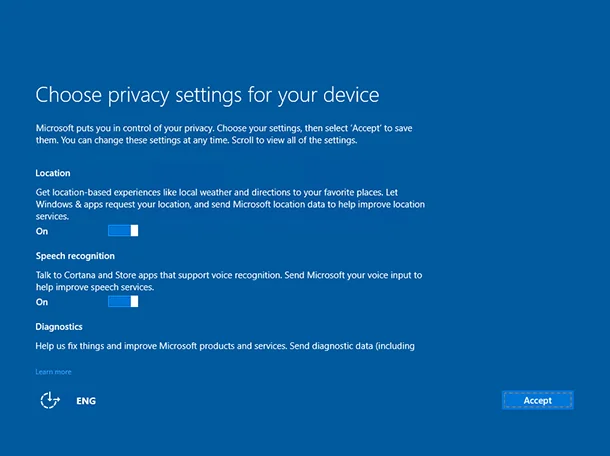
After several reboots and a screen asking about Privacy Settings, I was presented with the Windows 10 1703 log in screen. I logged in as my domain user which had a local profile on the VM and all my data and programs were there. When I logged in I was greeted by the “first run” screens that all new users receive when they log in to Windows 10 for the first time. Some of the personal customisations where there, such as the taskbar icons, but they were merged with the default Windows 10 taskbar icons. Sometime later when the VM checked for Windows Updates again, the latest updates for Windows Defender and the most recent Cumulative Update was installed, bringing Windows 10 1703 right up to date.

Upgrading Windows 10 1511 to Windows 10 1703 with WSUS
The update for existing versions of Windows 10 doesn’t require user interaction, it installs like all other Windows 10 updates preserving user data, profile customisation and installed software.
Finding and Approving the Update for Windows 10 1511
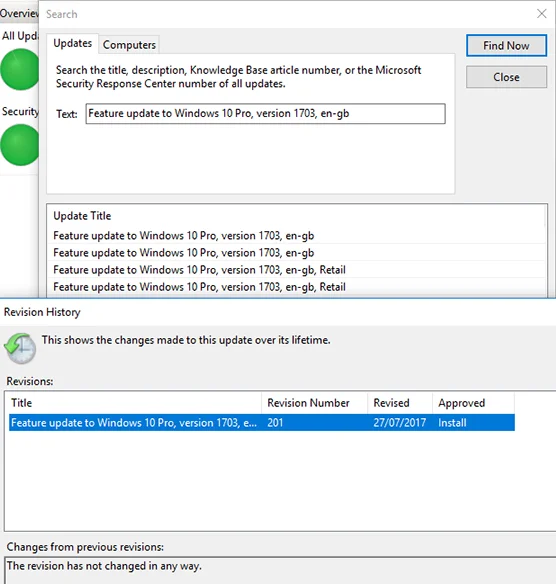
In WSUS the update for my Windows 10 1511 VM is listed as Feature update to Windows 10 Pro, version 1703, en-gb your language and edition may vary though.
- Expand the server node in the WSUS console.
- Right-click on Updates, and select Search in the menu.
- In the Search box, under the Updates tab enter the name of the update that is appropriate for you. Please note the edition and language may be different from my example above.
- When the search completes, you should have a few results.
- Right-click on each of the updates and select Revision History.
- You’ll want to select the update with the most recent date under the Revised heading. For me it was 27/07/2017.
- Right-click on the update you wish to approve, and select Approve.
- Choose the Computer Group you wish to Approve the update for and click OK. Please note: depending on your configuration this will download and push out the upgrade to Windows 10 on all devices in the group.
- Close the Search box, and WSUS should be downloading the update to Windows 10 1703. It is approximately 5GB in size.
Once the update has downloaded, it will be available to the devices it has been approved for.
Performing the upgrade on Windows 10 1511
I booted up the Windows 10 1511 VM and left it on the log in screen. The VM contacted the WSUS server and moved it’s computer object to the Upgrades Computer Group. Sometime later the VM rebooted from the log in screen and began the upgrade process.
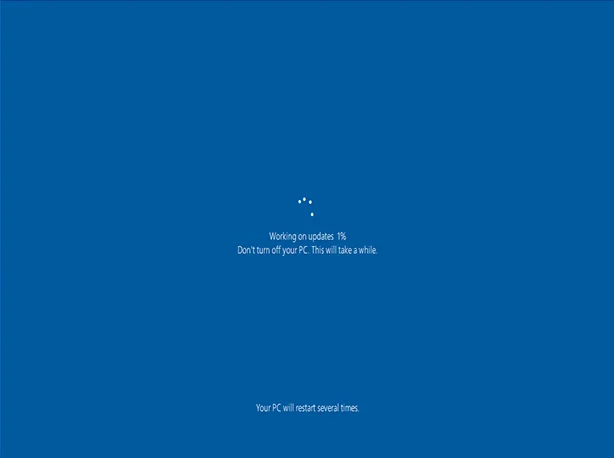
After several reboots during the upgrade, the VM booted to the Windows 10 log in screen. I logged in with my domain user which already had a local profile on the VM, and was greeted with the “first run” screens that new users receive when they log in to Windows 10 for the first time. Despite these screens appearing the data and software had been migrated and the customisation I had done as the user of the Start Menu and Taskbar had been preserved, with the exception of the Store and Edge icons had been re-pinned to the Taskbar. Sometime later when the VM checked for Windows Updates again, the latest updates for Windows Defender and the most recent Cumulative Update was installed, bringing Windows 10 1703 right up to date.
If you have any questions or comments, please leave them below.
-Mike