Windows Server Update Services (WSUS) can use a lot of resources, so why not use Windows Server Core and make the most of the resources you have. In this post I’ll go through the initial steps on how to deploy and configure a WSUS server using command line and PowerShell. This guide is also suitable for regular GUI Windows Server installations.
Installing Windows Server Core
Boot the server from the Windows Server media and on the “Select the Operating System you want to install” screen, select the option “Windows Server Standard” or “Datacenter” edition. The other options with “Desktop Experience” in brackets are the options for the other server editions with a GUI also installed.
Please note: You can no longer add and remove the GUI (Desktop Experience) with Windows Server 2016 as you could with Windows Server 2012 & 2012 R2. This is due to numerous problems with keeping the installation and removal process consistent with updates. With Windows Server 2016, the only way to add or remove the GUI is to re-install and select one of the server editions with the “Desktop Experience” option.
Initial Configuration
Once the install process has completed, you will be prompted with a command line window, and asked to set the Administrator password.
- Set the Administrator password.
- Type
sconfigto get the Server Configuration menu. It’s pretty straight forward. In the Server Configuration menu, you can configure all the basics required for the server. - For the first Domain Controller in the new forest, you’ll need to configure at least the Network Settings - IP address, subnet mask, gateway, and DNS.
- You may also want to configure the computer name. Configuring the computer name will require a restart.
- After the restart, log in to the server with the Administrator password you set in step 1.
Tip: “sconfig” is also present in the GUI version of Windows Server, making initial configuration of new servers easier.
Additional Storage Configuration
You may want to configure additional locally attached disks or iSCSI/MPIO storage. Creating new volumes that are locally attached can be done via the diskpart command line tool. Here’s the series of commands to create a new, NTFS formatted volume, with the drive letter of E:\ and the name “Data”, from a second disk in the server using the diskpart tool. First, run diskpart from the command line, then use the following commands:
|
|
iSCSI storage can be configured using the same GUI tools you would use in the GUI version of Windows Server. The MPIO feature must be installed before the tool is available. You can do this via PowerShell:
|
|
When MPIO is installed you can load the MPIO utility using mpiocpl. For the iSCSI utility you can use iscsicpl. iSCSI is installed as part of the base Windows Server feature set.
Install Windows Server Update Services (WSUS)
The following PowerShell command will install the WSUS feature:
|
|
Now we need to run some post install tasks. We’ll create a directory for the WSUS content on the E:\ drive.
|
|
To configure WSUS to use the directory we just created and the Windows Internal Database (WID is based on SQL Express), run the following command:
|
|
Alternatively you might want to use an external SQL server for the WSUS database, if so run the following command instead:
|
|
WSUS is now running and able to be configured further. This is possible with PowerShell, but not as straightforward as the installation above so we’ll be using the WSUS MMC on a remote computer or on the server itself if you installed Windows Server with the Desktop Experience.
To obtain the WSUS MMC on a remote computer we’ll need to install the Remote Server Administration tools (RSAT), run the following command in an elevated PowerShell session:
|
|
To view WSUS reports you’ll also need to download and install the following:
- Microsoft Report Viewer 2012 Runtime redistributable
- Microsoft System CLR Types for Microsoft SQL Server 2012: x64 version, x86 version
In case the links to Microsoft System CLR Types fail in future, here is the main download page link. This page links to components from the Microsoft SQL Server 2012 Feature Pack, you need to go to the Install Instructions section and download the specific component you need.
Configuring Windows Server Update Services
Once you have downloaded and installed all the software listed above on our admin PC, you can continue with the configuration.
- Open the Windows Service Update Services Microsoft Management Console (WSUS MMC).
- You should see a “Before You Begin” wizard. Click Next.
- Join the Microsoft Update Improvement Program if you wish.
- Choose Upstream server, as this is the first WSUS server we’ll choose “Synchronize from Microsoft Update”.
- Specify the Proxy Server settings if needed.
- Click “Start Connecting”.
- Select the applicable languages for our environment.
- Select the applicable Products. I recommend selecting all products as we’ll only be downloading updates that we actually need.
- Select the Classifications. I recommend selecting all except Drivers and Driver Sets. Drivers in WSUS increase the size of the database immensely.
- Configure the Sync Schedule. I recommend leaving this on manual until setup and synchronisation has been completed.
- Check the Begin initial synchronization box. This may also take a while.
- Click Finish.
Once the initial configuration is complete, now we can start to configure WSUS for every day operation.
- In the WSUS MMC go to the Options node.
- Setup a Synchronization Schedule. I recommend once or twice a day, out of regular hours. Click OK.
- Go to Automatic Approvals.
- There’s a built-in rule to automatically approve Critical and Security updates, meaning that they will be downloaded and distributed via WSUS without any admin interaction. I recommend enabling this, but don’t run the rule.
- You may also want to add a rule for Definition Updates from Exchange, Office, and Windows Defender if applicable to you. Click OK.
- Now go to Computers.
- Set the option here to Use Group Policy or registry settings on computers and click OK.
- Go to E-Mail notifications and enable them if you want status reports and Emails about the new updates that have been synchronised. Click OK.
- In the WSUS MMC, go to the Computers node.
- Create the computer groups that you require here. I recommend a ‘pilot’ group and a ‘regular’ group both for client devices and servers.
Configuring Group Policy
To enable our clients to get updates from WSUS using the settings above, you’ll need to configure the group policy for them.
- Open the Group Policy Management MMC and go to the Group Policy Objects node.
- Right click on the node and select New to create a new GPO for WSUS. Give it a name and click OK.
- Right click on the new GPO and click Edit to open it.
- Navigate to
Computer Configuration/Policies/Administrative Templates/Windows Components/Windows Update/Manage updates offered from Windows Server Update Service - Go to the setting “Specify intranet Microsoft update service location”.
- We’ll configure both “Set the intranet update service for detecting updates” and “Set the intranet statistics server” to
http://wsus-server-name.contoso.com:8530 - Go to “Enable client-side targeting” and enter the name of a group that you created in WSUS.
- For multiple groups, repeat steps 2 - 7 for each group.
- You can use Active Directory Security Groups to control which client devices have read access to the GPO with the desired WSUS group configuration.
There are lots of other settings in GPO to configure Windows Update that I recommend taking a look, specifically “Configure Automatic Updates” located in Computer Configuration/Policies/Administrative Templates/Windows Components/Windows Update/Manage end user experience which controls when client devices install updates.
Managing Updates
After some time (approximately 24 hours) our client devices should have contacted the WSUS server and be in the correct group. Now we need to approve the updates required for our environment.
- On the overview of our WSUS server, click on “Updates needed by computers”.
- Change the drop down menu “Approval” to “Unapproved” and click “Refresh”.
- Right-click on the Title bar and enable the “Supersedence” column.
- Click on the very tiny “Supersedence” column to sort the updates by Supersedence.
- Approve the top critical, security and any other updates you want to be installed on our devices.
- Once the devices have downloaded, installed, and reported back to the WSUS server, we’ll have a better idea if any more updates are required.
Maintenance and Troubleshooting
Keeping WSUS running over time requires some maintenance. I created a custom PowerShell script that runs every day to perform the maintenance on the database. More specifically it declines and deletes old updates, and old computers. It can also send a notification over e-mail or a webhook with information about it’s clean up run. I’ve posted about it here.
You can also clean up the WSUS database manually using the “Server Cleanup Wizard” found in Options. You can also run this via PowerShell:
|
|
You may encounter an error when trying to connect to the WSUS server using the MMC - Error: Unexpected Error, appears as Event ID 7053 in Event Viewer.
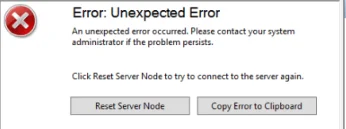
I’ve known this error to occur frequently. One fix is to navigate to %appdata%\Microsoft\MMC and delete the wsus file and then try connecting again.
IIS Configuration
I highly recommend configuring these IIS AppPool settings relating to WSUS. In an elevated PowerShell session run the following commands:
|
|
In the IIS Manager these PowerShell commands change the following values:
WSUS -> Application Pools -> WsusPool -> Advanced Settings
General:
Queue Length: 25000
CPU:
Limit Interval (minutes): 15
Process Model:
Idle Time-out (minutes): 0
Rapid-Fail Protection:
“Service Unavailable” Response: TcpLevel
Recycling:
Private Memory Limit (KB): 0
Regular Time Interval (minutes): 0
Finally, you can also try the following command, if needed:
|
|
Support My Work
If you would like to support me, please check out the link below.
If you have any questions or comments, please leave them below.
Thanks
-Mike